
Seedlings
A few weeks ago, I started the project of planting my seeds indoors.
At first there is nothing to do but water, cover, and wait, until...

... they poke their tiny little heads up.
What an exciting moment to see those first little ones pop up!!
In the past, I have only had pots, and started things in pots, (which I still do for flowers and a few varieties of leafy, spring time veggies and tomatoes.)
Starting things indoors was a little new, but not hard. They need seedling mix, good light, lots of water, and humidity.
First, I plotted on paper what veggies I wanted in my raised beds. (Please see my previous post if you want to learn how to build raised beds or how to plan your garden.)
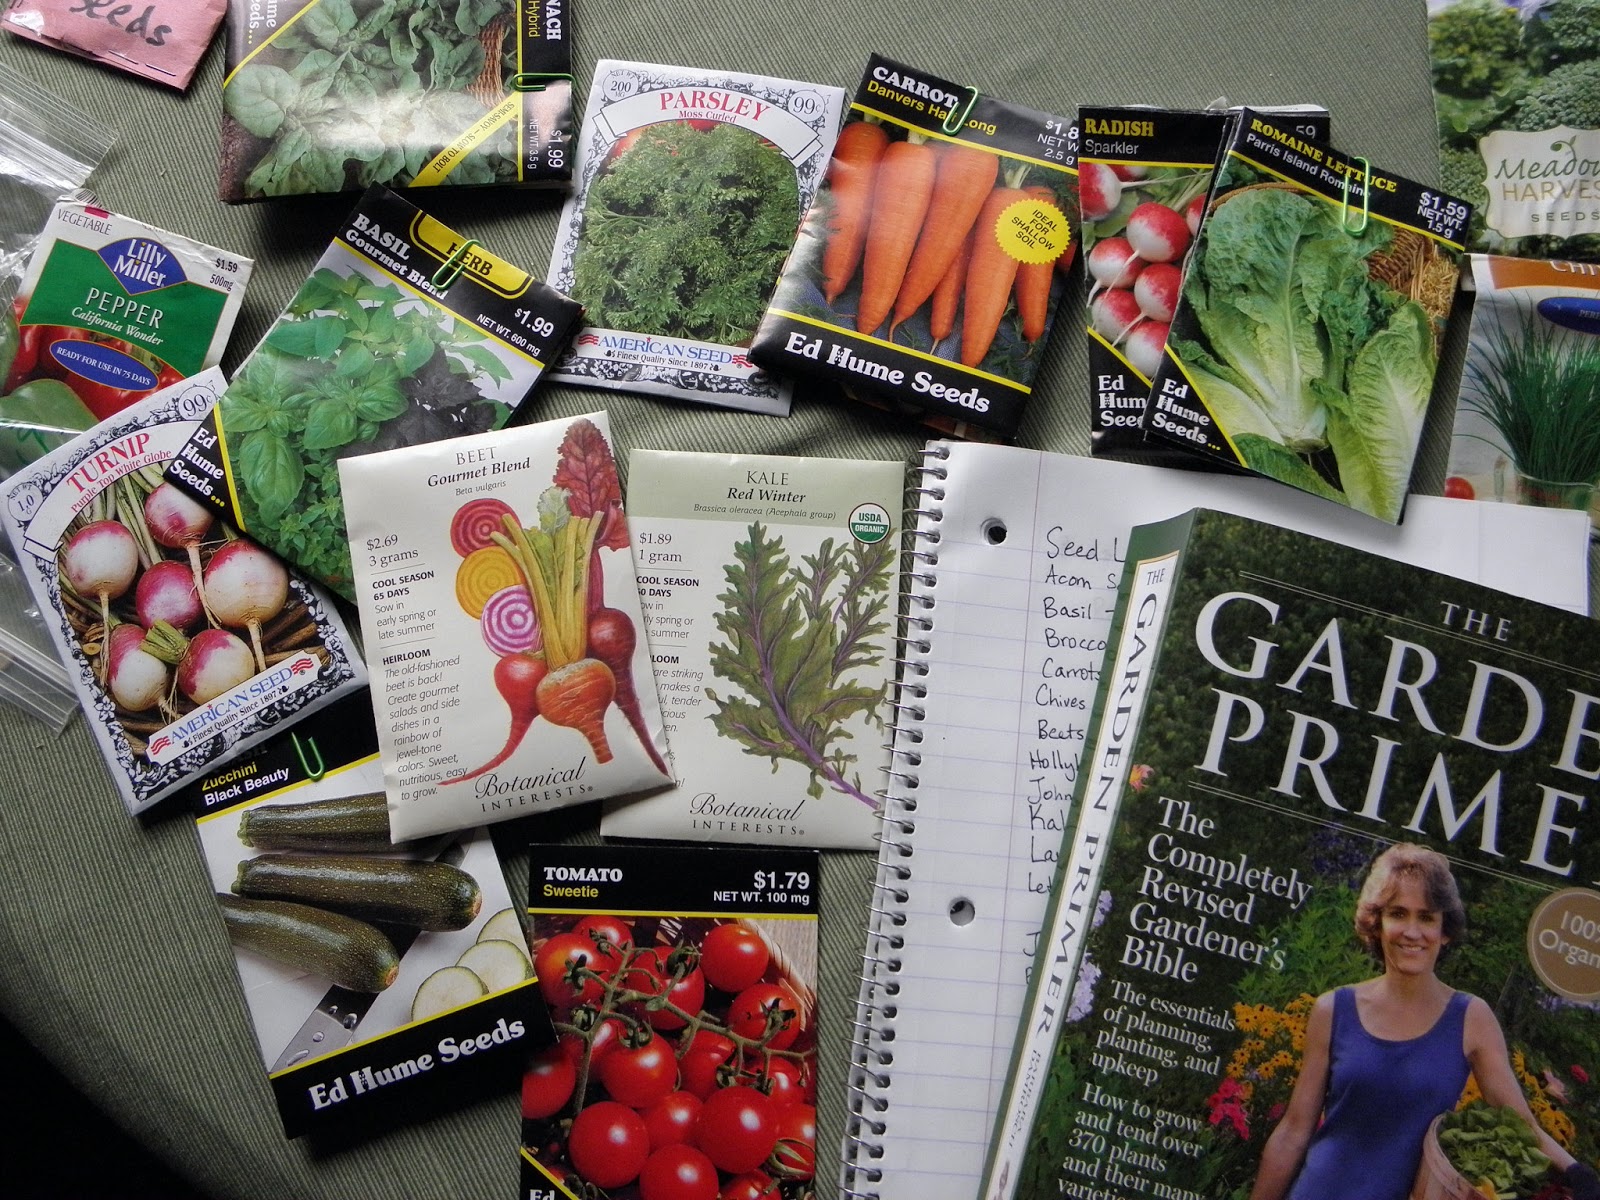
Then, I laid out all my seeds... Yes, all of them!

When I started to organize what I had, I found that I had collected three packages of carrots, several varieties of lettuce and basil, and discovered some unexpected treasures I had stored away and promptly forgot about.
I must confess, I was surprised by just how many seeds I have collected over my few years of gardening. I started with a few flowers in pots in college, containing a mini rose bush from Valentine's Day, (which still LIVES, thank you very much!), irises given to me by a lady at church, some annual flowers, and a few poor veggies that never really had enough room.
I won't even show you the picture.
Every summer I take pictures of the summer garden in full bloom to remember that season and those lovely plants. Those first few gardening years were rough!
However, taking pictures of it is a great way to document what you grew that year, what worked and what didn't (like a little zucchini in a 10" diameter pot, and carrots in a coffee tin? It was what I had, and worth a try!) It's fun to remember which plants you absolutely loved and would like to try again someday.
So, this is the year the carrots will have enough room, and the squash get their very own bed! And back to my kitchen table, which I covered with what I've been stashing away, to prepare for this planting season.
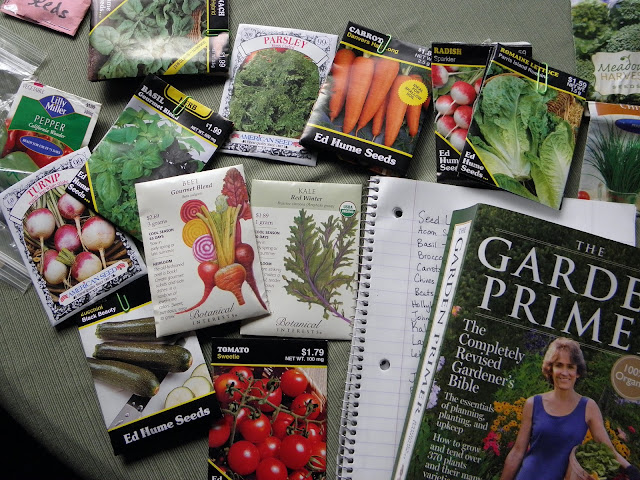
With all my planning done and my seeds organized, I put each group of seeds for each raised bed in its own envelope.

I covered my kitchen table with an old party table cloth that's seen better days, (to waterproof it from misting the seedlings,) and set off outside to fill up egg cartons I had been saving just for planting.
Easter is a fantastic time to stock up on egg cartons, and it's right before planting time... go figure! I don't think I will use the purple ones next year, and just the natural ones.
I didn't even think about the dye before hand. Oh well!
Make sure you start seeds using a seedling mix. It's light enough for the little seeds to push through and have a chance! I also found that for more tough seeds, like sunflowers, or ones I was starting outside in pots, mixing it half and half with potting soil worked well to hold the moisture needed for outside. Again, make sure it's light enough. You don't want compacted soil!
 Hahaha! I just realized the bag is upside-down. (Maybe you didn't even notice.)
That's because there's a handy-dandy handle at the top. :)

I always make sure to label! Get as specific as possible if you have more than one variety. I have several types of lettuce, and each kind I plant, I mark which one it is.
Mist seeds often and check the dirt, as a germinating seed needs moist soil.
Seeds need to be wet, warm, and humid for the best conditions to sprout.
I found that the best way to get the kind of humidity you need is to cover it with some kind of plastic. I know they sell these plastic cover things, but maybe you have a salad box, or the clear plastic top of some packaging. Get creative!!
On mine, I made tents!

Each planted carton got its own tent, which also gives it extra protection from my veg loving cat. (She now has her very own grass, she likes plants so much! Now, instead of eating the plants, though, she's taken to stepping on these tents.)
Now that some of the squash plants are getting tall, a salad box lid may be in order, unless I can get them outside soon. I'm considering tomorrow or the next day for transplanting because, after tonight's frost, we have some mild evenings coming so they can get adjusted. I also bought some frost covers to protect them from anything under 30 degrees (moderate frost).
 Zucchini squash growing taller...
 And taller...
 And TALLER!
It's starting to look like a zucchini plant now!
What an exciting moment to see those first little ones pop up!!
In the past, I have only had pots, and started things in pots, (which I still do for flowers and a few varieties of leafy, spring time veggies and tomatoes.)
Starting things indoors was a little new, but not hard. They need seedling mix, good light, lots of water, and humidity.
First, I plotted on paper what veggies I wanted in my raised beds. (Please see my previous post if you want to learn how to build raised beds or how to plan your garden.)
Then, I laid out all my seeds... Yes, all of them!

When I started to organize what I had, I found that I had collected three packages of carrots, several varieties of lettuce and basil, and discovered some unexpected treasures I had stored away and promptly forgot about.
I must confess, I was surprised by just how many seeds I have collected over my few years of gardening. I started with a few flowers in pots in college, containing a mini rose bush from Valentine's Day, (which still LIVES, thank you very much!), irises given to me by a lady at church, some annual flowers, and a few poor veggies that never really had enough room.
I won't even show you the picture.
Every summer I take pictures of the summer garden in full bloom to remember that season and those lovely plants. Those first few gardening years were rough!
However, taking pictures of it is a great way to document what you grew that year, what worked and what didn't (like a little zucchini in a 10" diameter pot, and carrots in a coffee tin? It was what I had, and worth a try!) It's fun to remember which plants you absolutely loved and would like to try again someday.
So, this is the year the carrots will have enough room, and the squash get their very own bed! And back to my kitchen table, which I covered with what I've been stashing away, to prepare for this planting season.
With all my planning done and my seeds organized, I put each group of seeds for each raised bed in its own envelope.

I covered my kitchen table with an old party table cloth that's seen better days, (to waterproof it from misting the seedlings,) and set off outside to fill up egg cartons I had been saving just for planting.
Easter is a fantastic time to stock up on egg cartons, and it's right before planting time... go figure! I don't think I will use the purple ones next year, and just the natural ones.
I didn't even think about the dye before hand. Oh well!
Make sure you start seeds using a seedling mix. It's light enough for the little seeds to push through and have a chance! I also found that for more tough seeds, like sunflowers, or ones I was starting outside in pots, mixing it half and half with potting soil worked well to hold the moisture needed for outside. Again, make sure it's light enough. You don't want compacted soil!

That's because there's a handy-dandy handle at the top. :)

I always make sure to label! Get as specific as possible if you have more than one variety. I have several types of lettuce, and each kind I plant, I mark which one it is.
Mist seeds often and check the dirt, as a germinating seed needs moist soil.
Seeds need to be wet, warm, and humid for the best conditions to sprout.
I found that the best way to get the kind of humidity you need is to cover it with some kind of plastic. I know they sell these plastic cover things, but maybe you have a salad box, or the clear plastic top of some packaging. Get creative!!
On mine, I made tents!

Each planted carton got its own tent, which also gives it extra protection from my veg loving cat. (She now has her very own grass, she likes plants so much! Now, instead of eating the plants, though, she's taken to stepping on these tents.)
Now that some of the squash plants are getting tall, a salad box lid may be in order, unless I can get them outside soon. I'm considering tomorrow or the next day for transplanting because, after tonight's frost, we have some mild evenings coming so they can get adjusted. I also bought some frost covers to protect them from anything under 30 degrees (moderate frost).


It's starting to look like a zucchini plant now!
For the covers, initially you can lay plastic right on top while the seeds are germinating. Once the plants really got going, it's time to make some covers.
For some of them, like this one, I cut the sides off of a gallon size zip lock bag to make a cover. I also cut some shish-kabob sticks in half, and stuck them in the high part of the cartons to provide the tent's structure. So far, this is working quite well. They are happy with a little extra moisture, and some protection from the cat,
... unless she decides to play Godzilla again.

When they are just started or are still very small, another idea is to put a small carton right inside a gallon size zip lock bag.

Trapping moisture like a boss!

Over time, I realized I needed something underneath it, because when egg cartons are wet, they are flimsy. I put a very old baking pan underneath (which is rusting on the bottom with all the moisture. That's okay with me.) I wanted something underneath so I can take the plants outside during the day to start hardening them off before I put them in the ground.

These are so close to being ready to go in the ground...
... especially that little acorn squash guy sticking out the side!
That's one of the ones I thought wasn't going to do anything!!

Right now, I have seedlings starting inside for...
~ 'Black Beauty' & 'Italian Striped' Zucchini
~ 'Little Marvel' Bush Peas
~ 'Tyee' Spinach
~ 'Sweetie' Cherry Tomato
Note: If you would like a cherry tomato start, please just let me know. These just went crazy!
~ Jalapeños!
From a pepper I got from the Latin Market! :D
~ Acorn Squash
Some seeds are from a store bought squash I saved the seeds from last fall, and some I bought through the seed exchange at Central Oregon Locavore when I thought the store bought ones weren't going to come up, SO....
Note: If you'd like an acorn squash start, please let me know!! I'm sure I have WAY too many!
If you want to learn about Central Oregon Locavore, go to
http://www.centraloregonlocavore.com/
If you'd like to learn more about Central Oregon Seed Exchange, go to
http://seedexchange.weebly.com/
I'm very sad to say my green pepper seeds are just not happening. I will keep watering them and keep hoping. I planted a second bunch, just in case, and still nothing. Maybe my seed is too old. That can happen.
Now we turn to outside seedlings!
Just the other day, I looked in my raised beds, and saw some cute little 'sparkler' radish guys poking their heads up! Now they are all up in a line!

They are just tall enough that I can now see them from my kitchen window!
I also have 'candy striped blend' beets coming up...

and 'purple top white globe' turnips!

Yes, they look just like the radishes. That's because they are in the same root veggie family. And they taste similar too! Turnips eaten raw taste like a mild radish, and are great in salads. Yum!
In pots outside, I also have a mix of sunflowers coming up, 'Tyee Hybrid' Spinach, and 'Grand Rapids' Leaf Lettuce. I have several other things in the raised beds that haven't come up yet, and every day I go out there, I find a new little plant!
 Me, excited about my seedlings! Haha!
As you can tell, I am super excited!!
I hope to start putting these little indoor starts in the ground soon,
as the weather warms and they get bigger.
Thanks for visiting my blog!
I hope you are inspired to start up your own green spaces.
If you've already started, what little plants are you excited about this year?
Anything already poking its little head up?
You should know that next time, I hope to do a Part II on the raised beds as
I just figured out the hoops and caging over top to keep the neighborhood
cats and deer out. Yay!
And sometime soon, I promise to write a post about other home-living endeavors, different than gardening... but I'm so excited about plants!
(If you need proof, look at the picture of my eyes again! Haha!)
Again, Happy Planting!
 (Tiny Spinach Plants)
I'm very sad to say my green pepper seeds are just not happening. I will keep watering them and keep hoping. I planted a second bunch, just in case, and still nothing. Maybe my seed is too old. That can happen.
Now we turn to outside seedlings!
Just the other day, I looked in my raised beds, and saw some cute little 'sparkler' radish guys poking their heads up! Now they are all up in a line!

They are just tall enough that I can now see them from my kitchen window!
I also have 'candy striped blend' beets coming up...

and 'purple top white globe' turnips!

Yes, they look just like the radishes. That's because they are in the same root veggie family. And they taste similar too! Turnips eaten raw taste like a mild radish, and are great in salads. Yum!
In pots outside, I also have a mix of sunflowers coming up, 'Tyee Hybrid' Spinach, and 'Grand Rapids' Leaf Lettuce. I have several other things in the raised beds that haven't come up yet, and every day I go out there, I find a new little plant!

As you can tell, I am super excited!!
I hope to start putting these little indoor starts in the ground soon,
as the weather warms and they get bigger.
Thanks for visiting my blog!
I hope you are inspired to start up your own green spaces.
If you've already started, what little plants are you excited about this year?
Anything already poking its little head up?
You should know that next time, I hope to do a Part II on the raised beds as
I just figured out the hoops and caging over top to keep the neighborhood
cats and deer out. Yay!
And sometime soon, I promise to write a post about other home-living endeavors, different than gardening... but I'm so excited about plants!
(If you need proof, look at the picture of my eyes again! Haha!)
Again, Happy Planting!


